

Kentico’s module system is a great framework to both extend existing functionality as well as build new custom elements. Today I will walk you through the process of creating a particularly useful self-contained module: a staging filter.
Kentico Staging is a fantastic tool that allows any change to content or objects to be pushed between environments over a HTTP/HTTPS web service. By default, when Staging is enabled, any change to content or objects results in the creation of a staging task, which can then by synced to staging target servers.
The Issue: Unwanted Staging Tasks
While this model works well, we often run into scenarios where changes certain objects or content result in unwanted staging tasks. A common example of this is updates to users. Any change made to a user, including a simple logon event, will generate a staging task. In nearly all cases, we don’t want to sync these changes between environments, so these tasks must be manually deleted. It would be so much easier if certain tasks were never created in the first place.
The Solution: Build a Filter Module
Our solution to this problem was to build a Staging Filter Module, which allows a user to specify code names for objects and paths in the content tree for pages that shouldn’t be synced. On large sites, doing this can drastically reduce the clutter of the Staging task list, and makes life easier for everyone.
This is a simple module that doesn’t utilize any custom tables (aka Classes), but it does use custom settings. It adds a hook into the StagingEvents.LogTask.Before global event that checks to see if the staging task should be created or not. If it shouldn’t, it suppresses the creation of that particular task.
Building the Module
The first thing to do is: read the manual! Kentico has provide great documentation how to build custom modules, so definitely check it out before you get started: https://docs.kentico.com/k9/custom-development/creating-custom-modules
Note: in this example, the Web App project model is used. Using the Web Site model is slightly different because the code files are placed in the /App_Code folder, but the other concepts are the same.
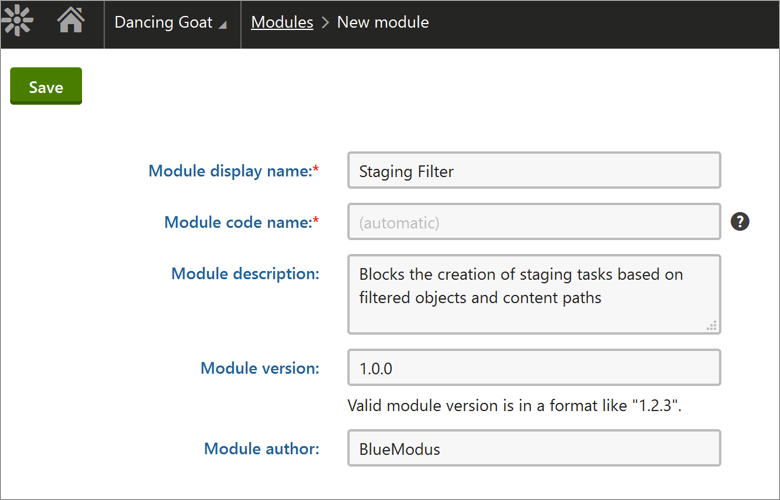
Step 1. Define the Module in Kentico
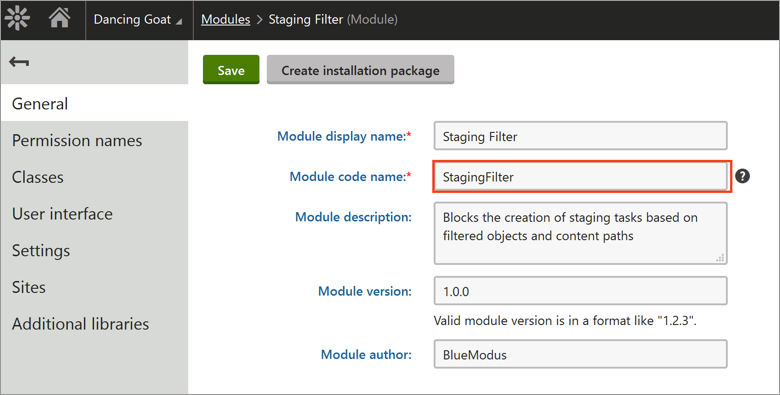
Go the Modules application and hit the New Module button. Fill out the fields as appropriate:
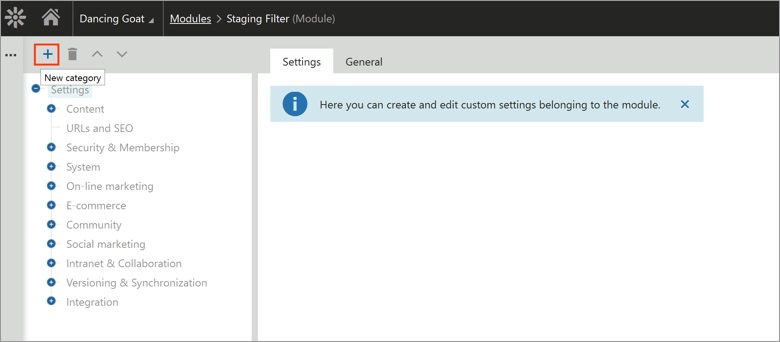
Once the module is created, you can go into the Settings tab to add some custom settings. First, click the “plus” button on the top left to add a new category called “Staging Filter.”
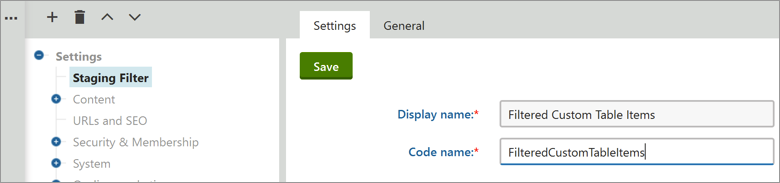
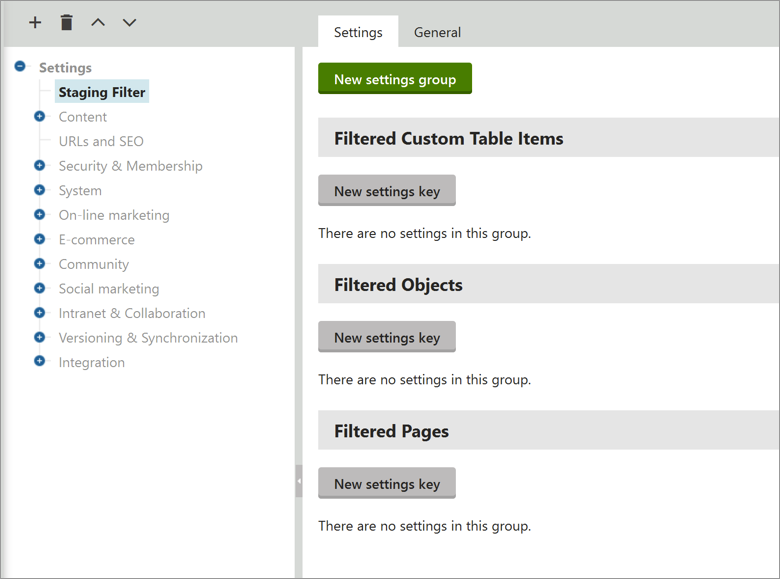
After creating the new category, we can now add some settings. You do this by creating settings groups, then adding individual settings into each group. We’re going to add three groups: Filtered Custom Table Items, Filtered Objects, and Filtered Pages, like so:
After this is complete, you should see the following:
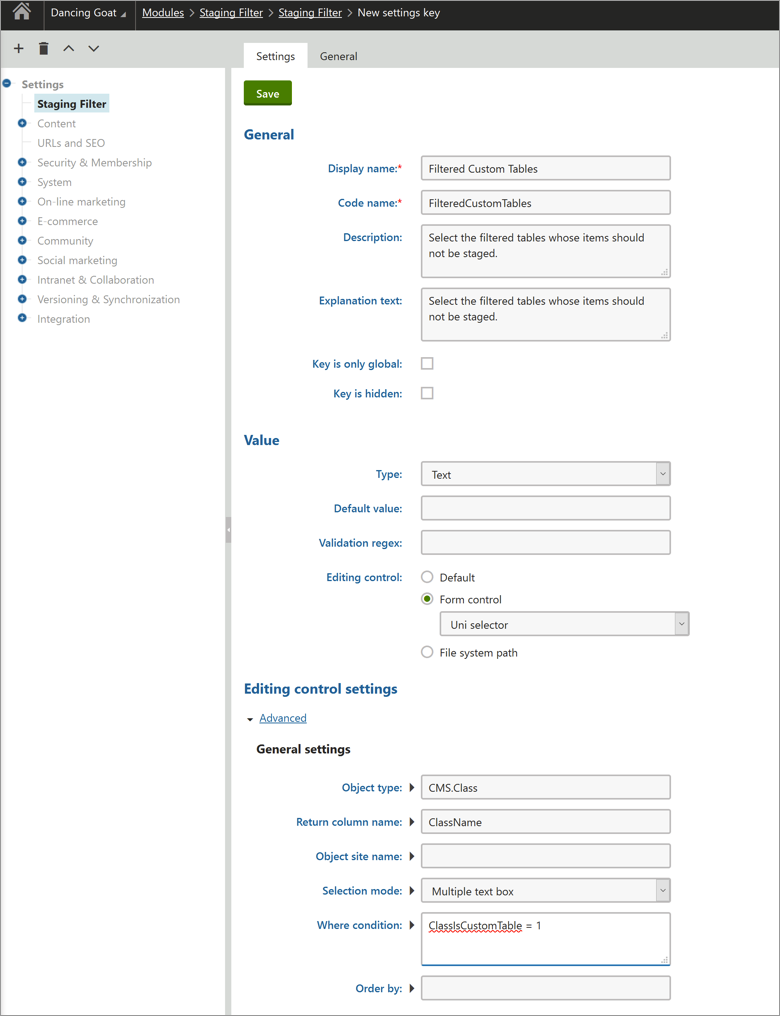
Now we’re going to add individual settings to each group. Hit the "New settings key" button under Filtered Custom Table Items, then add the settings below. Note the use of a Selector and its settings; this will allow multiple custom tables to be easily selected.
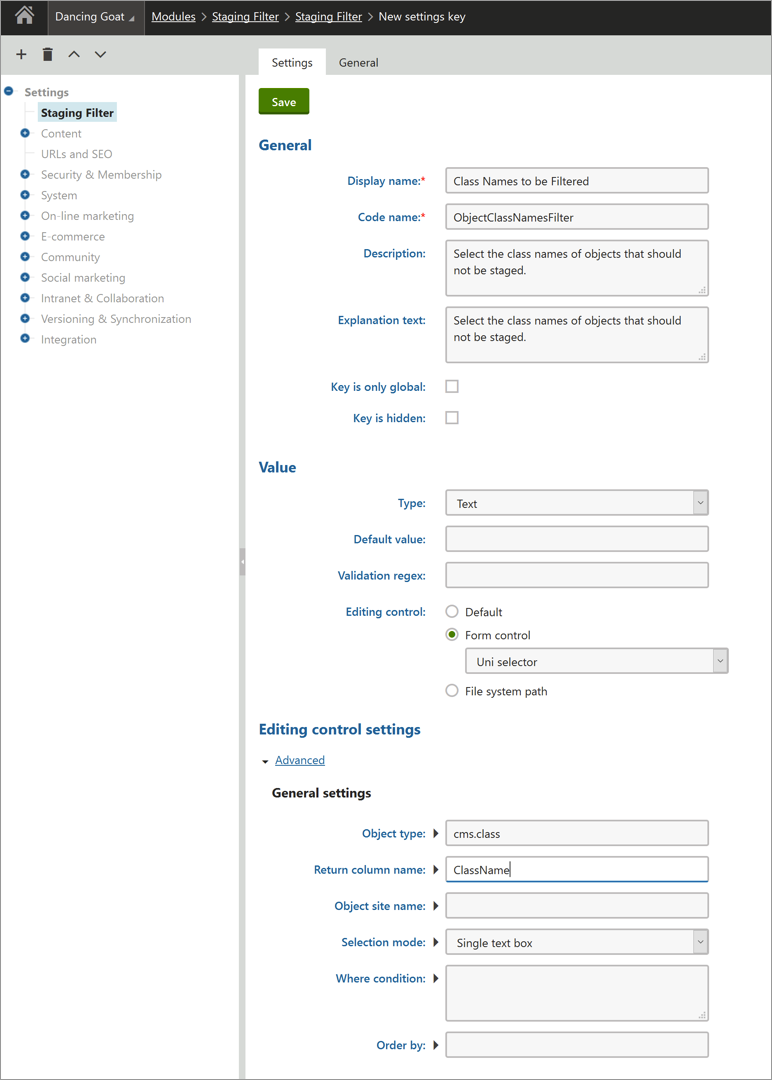
Once this setting is created, move on to the Filtered object setting. Hit the "New settings key" button under Filtered Objects, and fill out the fields as below. Note that the Uni selector is used again, but it will return all object types.
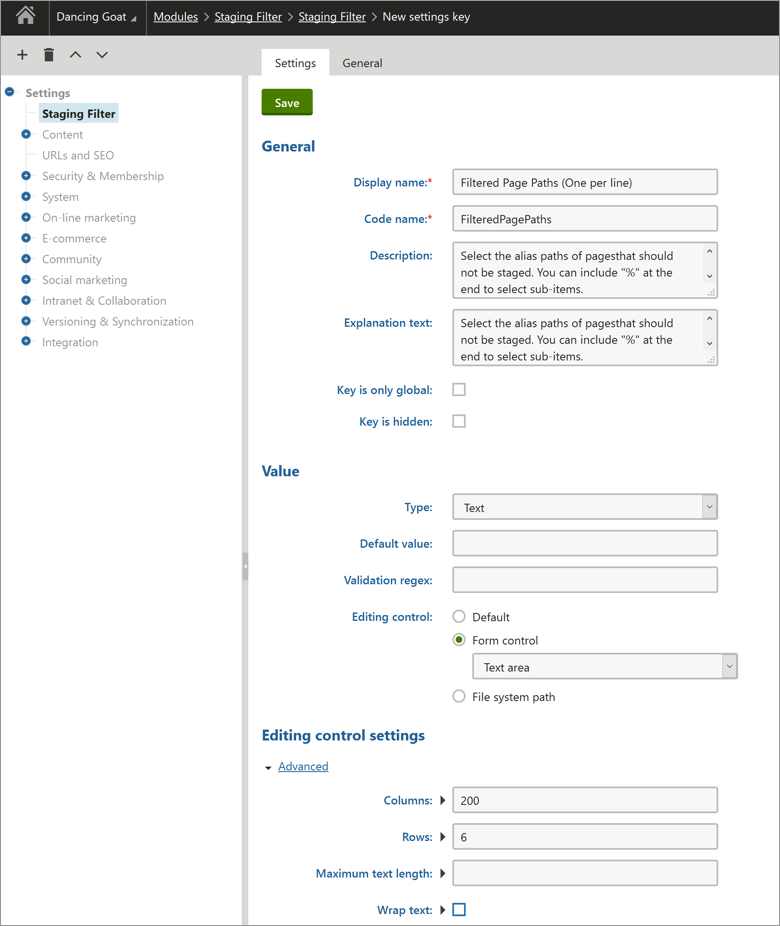
Finally, add the Filtered Page Paths setting under the Filtered Pages setting group. This one will be a bit different than the others, it will simply use a text area with paths on each line.
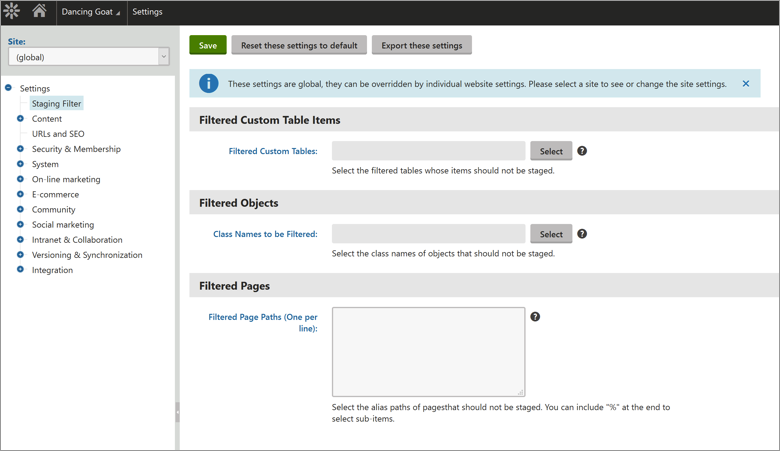
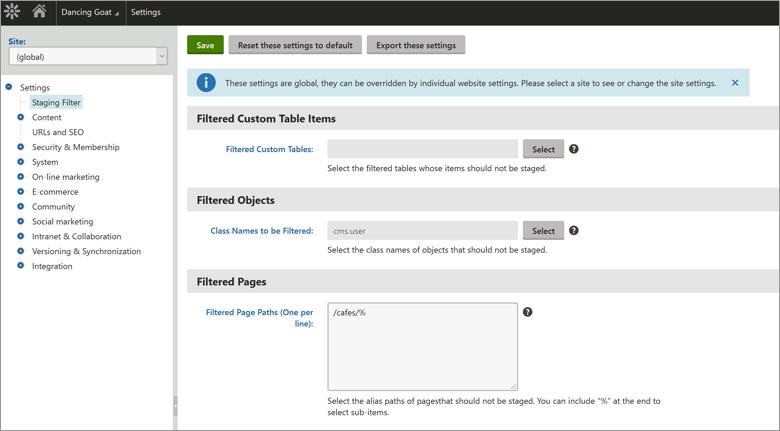
Once these have been added, you can go to the Settings application and see them in action:
Step 2. Build the Global Event Handler
Now that we’ve registered the module in Kentico and added the settings keys so users can manage the settings for the Staging Filter, it’s time to write some code.
What we’re going to do is build a global event handler that will hook into the StagingEvents.LogTask.Before event. This event fires after the staging task has been created in memory, but before it’s been saved to the database. The code will inspect the task’s referenced object and then decide if it should be saved or not.
(See https://docs.kentico.com/display/K9/Handling+global+events for more information about handling global events. This is one of the most powerful tools that Kentico provides, as you can hook into just about everything.)
Below is the code for the file. Note that this should be placed in the /Old_App_Code (or /App_Code for Web site projects) folder, under CMSModules/{ModuleCodeName}. It should be placed here, located under the proper folder, so that when you export the module, it will know where to look to find the code files and include them in the package.
You can find the Module Code Name by going to Modules/Select Module/General tab.
In this example, the code file is located here:
/Old_App_Code/CMSModules/StagingFilter/StagingFilterEventHandler.cs
using CMS.Base;

using CMS.Synchronization;

using CMS.DocumentEngine;

using CMS.DataEngine;

using System.Collections.Generic;

using System;

using System.Linq;

[StagingFilterEventHandler]

public partial class CMSModuleLoader

{

 /// <summary>

 /// Staging Filter attribute class.

 /// </summary>

 private class StagingFilterEventHandler : CMSLoaderAttribute

 {

 /// <summary>

 /// Called automatically when the application starts

 /// </summary>

 public override void Init()

 {

 // Assigns a handler to the StagingEvents.LogTask.Before event

 // This event occurs before the system creates content staging synchronization tasks

 StagingEvents.LogTask.Before += LogTask_Before;

 }

 private void LogTask_Before(object sender, StagingLogTaskEventArgs e)

 {

 // Handles content staging exclusion of documents

 if (e.Object is TreeNode)

 {

 // Gets the synchronized document

 TreeNode document = (TreeNode)e.Object;

 var filteredPagePaths = GetFilteredPagePaths();

 foreach (var path in filteredPagePaths)

 {

 var lowerPath = path.ToLower();

 if (lowerPath.EndsWith("/"))

 {

 lowerPath = lowerPath.Remove(lowerPath.Length - 1, 1);

 }

 if (path.EndsWith("%"))

 {

 // Wildcard

 if (document.NodeAliasPath.ToLower().StartsWithCSafe(lowerPath.Replace("%", "")))

 {

 e.Cancel();

 }

 }

 else

 {

 if (document.NodeAliasPath.ToLower() == lowerPath)

 {

 e.Cancel();

 }

 }

 }

 }

 // Handles content staging exclusion of objects

 else

 {

 // Gets the synchronized object

 GeneralizedInfo obj = e.Object.Generalized;

 var filteredObjects = GetFilteredObjects("StagingFilter.ObjectClassNamesFilter");

 // Gets the synchronization task

 StagingTaskInfo stagingTask = e.Task;

 foreach (var filtered in filteredObjects)

 {

 if (obj.TypeInfo.ObjectClassName.ToString().ToLower() == filtered.ToLower())

 {

 e.Cancel();

 }

 }

 // CustomTable Items

 if (obj.TypeInfo.ObjectClassName.ToString().ToLower().Contains("customtableitem"))

 {

 var filteredCustomTables = GetFilteredObjects("StagingFilter.FilteredCustomTables");

 foreach (var filtered in filteredCustomTables)

 {

 if (obj.TypeInfo.ObjectClassName.ToLower() == filteredCustomTables[0].ToLower())

 {

 e.Cancel();

 }

 }

 }

 }

 }

 private List<string> GetFilteredObjects(string settingsName)

 {

 // Default empty output

 var output = new List<string>();

 try

 {

 var settingsKey = SettingsKeyInfoProvider.GetSettingsKeyInfo(settingsName);

 if (settingsKey == null)

 {

 return output;

 }

 var objects = SettingsKeyInfoProvider.GetSettingsKeyInfo(settingsName).KeyValue.Split(';');

 if (objects != null && objects.Length > 0)

 {

 output = objects.ToList();

 }

 return output;

 }

 catch

 {

 return output;

 }

 }

 private List<string> GetFilteredPagePaths()

 {

 // Default empty output

 var output = new List<string>();

 var key = SettingsKeyInfoProvider.GetSettingsKeyInfo("StagingFilter.FilteredPagePaths");

 if (key != null && key.KeyValue != null)

 {

 // Split on line breaks

 var objects = key.KeyValue.Split(new string[] { "\r\n", "\n" }, StringSplitOptions.None); ;

 if (objects != null && objects.Length > 0)

 {

 output = objects.ToList();

 }

 }

 return output;

 }

 }

}
Once this code is compiled into the solution, Kentico will automatically register the event handler and the code will be executed every time a new staging task is created. The e.Cancel() function in the event tells Kentico to stop the process of saving the task, so it’s never written the database.
In this example, the CMS.User object type has been specified as a filtered object type. Now, when users are edited, the related staging tasks are never created.
In addition, the path /cafes/% has been specified, so if any page under that path is modified, a staging task won’t be created either. Note that updating pages may also update the SKU or other objects, so you may need to test out your work and tweak the settings a bit.
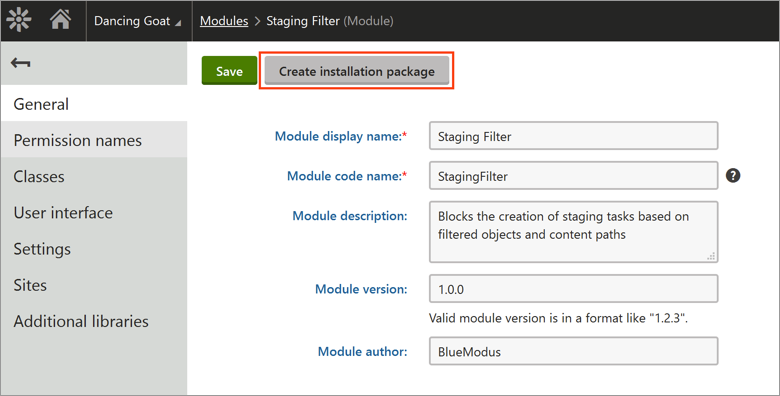
If you export the module and settings keys, you can also package up the entire module and install it into other instances of Kentico. You can even create a Nuget package by hitting the "Create installation package" button under the General tab of the module:
When you hit this button, Kentico will identify dependencies (such as Setting Keys) and include them automatically:
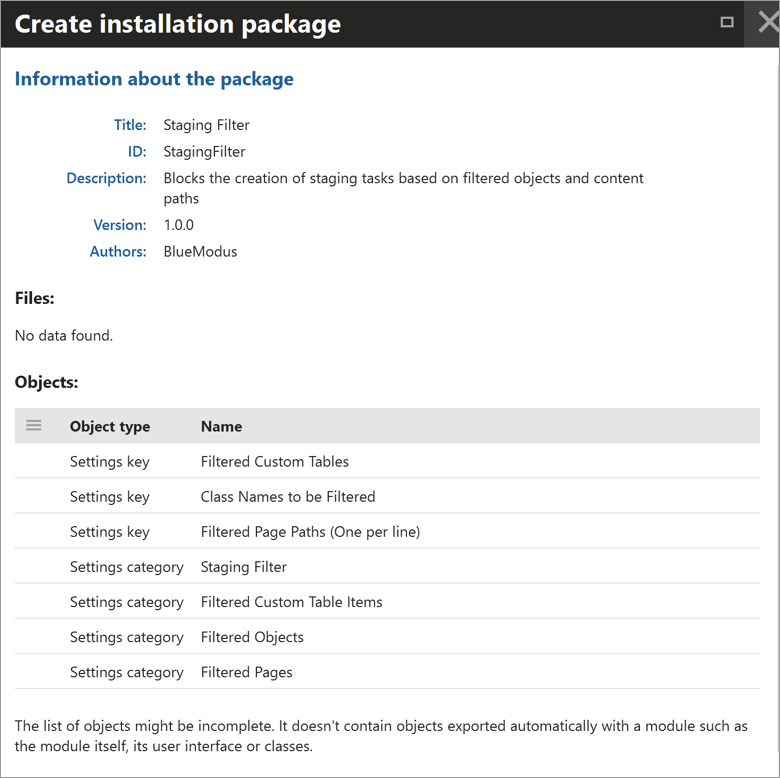
Note that if you use the Nuget approach, the physical files won’t be included. If you want to include those, you will have to manually export the module and its dependencies.
A Convenient and Practical Solution
We have found this to be an extremely useful module that our BlueModus team uses all the time. I hope that this overview was helpful in understanding how to build custom modules in Kentico.
If you have any questions or feedback about this module, I'd be happy to hear your thoughts. Feel free to reach out via email or Twitter!


